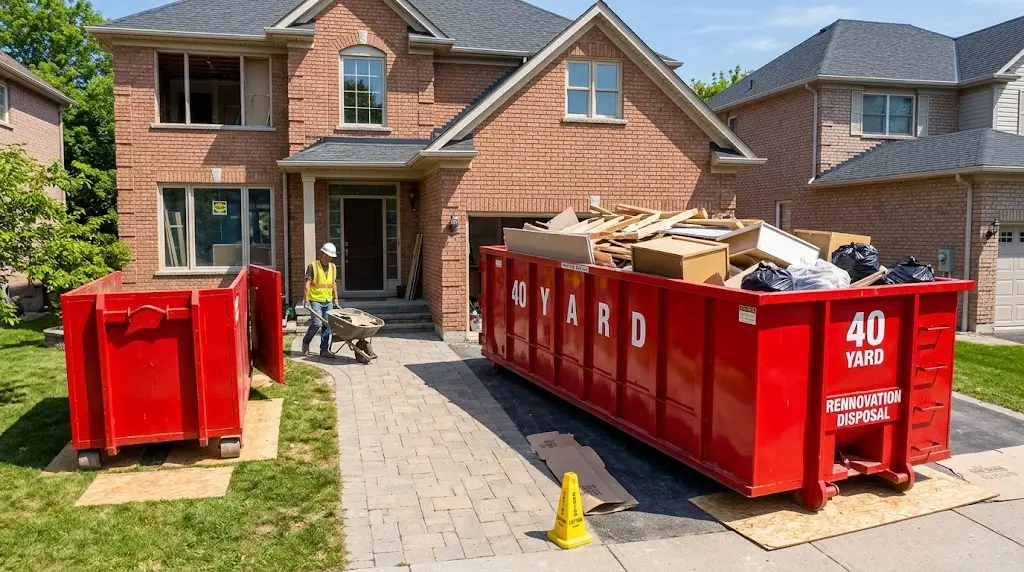
Multi-room renovations are exciting, but the mess can get out of hand fast. Once you have more than one space torn up at the same time, debris has a way of “temporarily” landing in hallways, on stairs, and right where people need to walk. That is when projects slow down, tempers flare, and safety risks go up.
A 40-yard dumpster rental can help you control the chaos, not by magically creating less debris, but by giving you a reliable, centralized place to put it so it never becomes a walkway problem in the first place. The key is planning the flow of waste the same way you plan the flow of materials. If demo and trash movement are unplanned, walkways become the default storage zone.
Below is a practical, jobsite-tested approach for keeping debris out of walkways during a multi-room renovation, whether you are a contractor running crews or a DIYer managing nights and weekends.
Why walkways get clogged in multi-room renovations
Walkways are convenient. That is the problem. Hallways, stairs, and doorways are the natural “in-between” spaces, so debris piles up there when:
- A room is mid-demo and you are waiting on a truck, a dump run, or a container pickup.
- You are trying to keep debris “out of the work area” so the next trade can start.
- You are staging materials and trash in the same corridor because it feels efficient.
- The disposal plan is “we’ll deal with it later,” which is fine for one room, but not three.
When walkways become staging zones, you get predictable consequences:
- Slower movement for people and tools
- Increased trip hazards and injuries
- Scratched flooring and damaged trim in finished areas
- Dust tracking into clean rooms
- Fire egress concerns, especially on stairwells and narrow corridors
The fix is less about working harder and more about creating a clear path from demo area to disposal that is easy to use every single time.
Why a 40-Yard roll-off container is often the right fit
For multi-room renovations, debris volume is rarely small. Even if you are not tearing down walls, the combined waste from cabinets, drywall, flooring, trim, packaging, and old fixtures adds up quickly. A 40-Yard roll-off container is popular on larger projects because it gives you:
- High volume capacity, so you are not constantly trying to “make it fit”
- Fewer swap-outs and fewer pauses in demo
- A place to consolidate debris from multiple rooms without stacking inside the home
- Better control over where the mess lives
Just as important, the big container supports a habit. If the dumpster is available and easy to reach, people actually use it. That is what keeps hallways clear.
Start with a debris-flow plan, not just a dumpster order
Before the first piece of drywall comes down, map out how debris will move.
Step 1: Pick the “debris highway”
Choose one primary route from the work zones to the container. Ideally it is:
- The shortest path
- Wide enough for two people to pass
- Not the route you are using to move new materials in
If you have to share the route, set traffic rules. For example: “Trash moves out from 9 to 11, materials move in after lunch.” On a busy renovation, simple timing rules prevent bottlenecks.
Step 2: Protect the route
If debris has to cross finished flooring or tight corners, protect it:
- Ram board or heavy floor protection along the route
- Corner guards on freshly painted walls
- Stair tread covers if you are using stairs
The goal is to remove the excuse to “just drop it here for a minute.”
Step 3: Create a transfer point
Inside each room, designate a transfer point where debris is gathered before it leaves the room. This could be near the door, but not in the doorway. It should be a spot where:
- Bags can be tied
- A wheelbarrow can park
- Dust can be managed
A transfer point reduces wandering. Wandering is what creates debris trails.
Placement matters: make the container easy to use
A 40-Yard container is only helpful if it is positioned so people can use it without frustration. If the dumpster is awkward to reach, walkways will fill up again because “we’ll take it out later.”
Consider:
- Distance to the door: Too far encourages staging inside.
- Angle and approach: Make sure a wheelbarrow, cart, or debris sled can reach it without weaving between vehicles.
- Clearance: Look up for branches and lines, and check overhead clearance near driveways and placement areas.
- Surface: Soft lawns, pavers, or decorative concrete need protection planning. If you are unsure, plan ahead with plywood or boards.
If you are working in a neighborhood with limited space, you may also need to think about street placement rules and local permits. Requirements vary by municipality. When in doubt, confirm before delivery so the container is not relocated after the fact.
Use the “no-debris-in-walkways” rule, and make it real
This rule only works if you make it practical. Here is a simple system that crews and DIYers can follow:
The rule
Nothing is allowed to sit in hallways, stairs, doorways, or main paths. Not “for five minutes,” not “until lunch,” not “until the dumpster gets here.”
The support
Give people a fast alternative:
- Keep contractor bags, bins, or a wheelbarrow staged at the room transfer point
- Schedule mini-hauls: 10 minutes every hour dedicated to moving debris out
- Assign a rotating “run out” role for crews, especially during heavy demo
If you want a clean site, build trash movement into the schedule. It should not be an afterthought.
Keep dust and small debris from spreading
Multi-room renovations create dust that travels. A full dumpster plan should include containment.
Practical dust-control tactics:
- Close doors and hang plastic sheeting where needed
- Use a box fan in a window (when appropriate) to exhaust dust
- Sweep or vacuum the debris route at least once a day
- Use tack mats or simple drop cloths at transition points
This matters because when dust and grit collect in hallways, people start avoiding the route. Avoiding the route leads to new debris piles.
Loading strategy: maximize space without creating problems
A 40-Yard container has a lot of room, but poor loading wastes capacity and can cause safety issues. To keep walkways clear, you want the container to stay usable throughout the project, not become a game of “where do we put this next thing?”
Load heavy, flat items first
Start with:
- Drywall sheets and chunks
- Lumber, framing debris
- Subfloor, sheathing
- Old countertops (where allowed)
Place them flat to create a stable base.
Break down bulky items
Cabinet boxes, large cardboard, and fixtures can eat volume quickly. Break down what you reasonably can:
- Flatten cardboard
- Knock cabinets apart if it saves space
- Cut long trim or studs if needed for safer loading
Avoid air gaps
Air gaps are the silent capacity killer. If you toss items in randomly, you create a “cave structure” where nothing stacks well. That leads to “we need another dumpster” sooner than necessary, and that is how debris ends up back in the hallway.
Keep the top edge rule in mind
Do not overfill above the top rails. Overfilled containers can delay pickup or require rework on site. Plan to keep debris level and contained.
Watch the weight, especially with mixed materials
Volume is only half the equation. Renovation debris can get heavy fast depending on what you are removing. Materials that can drive weight up include:
- Plaster and lath
- Tile and mortar
- Concrete and brick
- Dirt, stone, and landscaping material
Even though a 40-Yard container is big, weight limits still apply. If your multi-room renovation includes heavy materials, consider separating loads if possible or planning for a swap-out before you hit weight issues. The goal is predictable disposal, not a surprise bill or a stalled pickup.
What should not go in the container (plan this early)
Every area has rules, and disposal facilities have restrictions. You will want to identify restricted or regulated items before they end up in a pile. For example, appliances may be acceptable as long as they do not contain regulated material (like freon in refrigerators). Paint, chemicals, and certain electronics often have special requirements.
The simplest way to avoid walkway clutter is to set up a “do not toss” corner early:
- A bin for regulated items that need special handling
- A stack area for donation or salvage
- A labeled spot for scrap metal if you plan to recycle it
If people are unsure, they will hesitate. Hesitation creates piles. Clear rules prevent both.
A practical schedule for multi-room debris removal
Here is a simple cadence that works for many projects:
Morning (first 15 minutes):
- Clear the debris highway
- Stage bags/bins in each active room
- Confirm the container is accessible
Midday (10 minutes):
- Run out bags and loose debris
- Flatten boxes and packaging
- Sweep main routes
End of day (20 to 30 minutes):
- Final debris run
- Quick sweep and hazard check
- Close out the container area so wind does not blow loose trash
When you do this daily, the house or site feels controlled, even during major work.
Common mistakes that cause walkway pileups
If you want one quick checklist of what to avoid, it is this:
- Waiting until demo is finished to deal with debris
Debris removal should happen during demo, not after. - Placing the container where it is hard to reach
Convenience drives compliance. - Mixing materials and salvage in the same pile
Separate “keep” and “toss” from day one. - Not protecting the debris route
Damage risk makes people avoid the route, then piles return. - Ignoring weight risk
Heavy material surprises can interrupt the disposal plan and create backlog.
Final takeaway: treat debris movement like a trade
On a multi-room renovation, debris is not a side issue. It is a workflow. If you plan it, walkways stay clear, the site is safer, and the work moves faster. A 40-Yard roll-off container supports that workflow by giving you the capacity to keep everything moving out, instead of letting it creep into the corridors.
Whether you are a contractor trying to keep crews productive or a DIYer trying to keep your home livable during a renovation, the win is the same: debris goes directly to the container, not into the paths people need to use.