

Black Epoxy Garage Floor: The Complete Guide for Homeowners
A black epoxy garage floor transforms a plain concrete slab into a polished, durable surface that holds up to years of use. This guide covers everything from surface preparation and product selection to application steps and cost estimates. Whether you are a first-time DIYer or hiring a professional, you will find the information you need to make the right choice for your garage.
What Makes Black Epoxy the Top Garage Choice
Black is one of the most popular color choices for epoxy garage floors, and for good reason. It hides oil stains, tire marks, and dirt far better than light-colored alternatives. The dark finish gives any garage a clean, high-end appearance similar to a luxury car showroom.
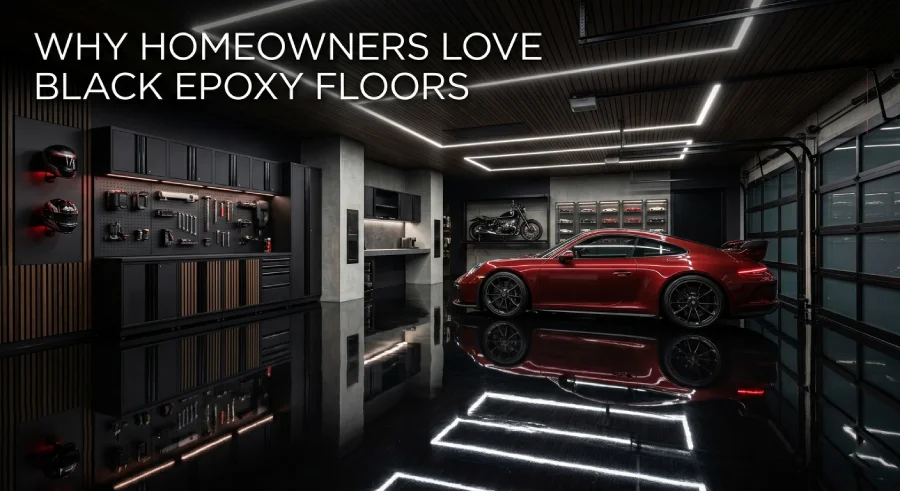
Epoxy coatings bond directly to concrete, creating a hard shell that resists impacts, abrasion, and moisture. When properly applied, a black epoxy floor can last 10 to 20 years before requiring a recoat. That kind of longevity makes it one of the best value upgrades a homeowner can make.
The visual appeal is just as important as the function. A glossy black surface reflects overhead lighting, making the garage feel larger and brighter. Many homeowners pair it with white or gray walls to create a strong contrast that looks professionally designed.
Black Epoxy Floor Overview Table
| Feature | Details |
|---|---|
| Coating Type | 100% solids or water-based epoxy |
| Finish Options | Gloss, semi-gloss, satin |
| Coverage Per Kit | 200 to 500 sq ft depending on product |
| Dry Time | 24 to 72 hours for foot traffic |
| Full Cure Time | 7 days before parking vehicles |
| Average DIY Cost | $3 to $7 per sq ft |
| Professional Install Cost | $7 to $15 per sq ft |
| Lifespan | 10 to 20 years with proper care |
| Best Surface | Bare, profiled concrete |
How to Prepare Your Garage Floor for Epoxy
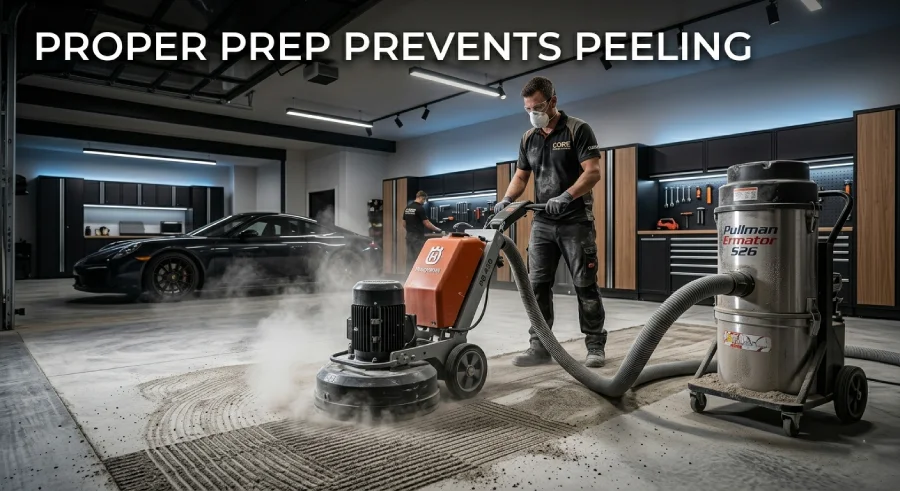
Preparation is the single most important step in any epoxy project. Skipping or rushing this phase causes peeling, bubbling, and premature failure. The floor must be clean, dry, and properly profiled for the coating to bond.
Follow these steps before you open a single can:
- Clear the entire garage and sweep up all loose debris.
- Test for moisture by taping a plastic sheet to the floor and waiting 24 hours. Any condensation underneath means moisture is present.
- Degrease the surface using a dedicated concrete degreaser, scrubbing with a stiff brush.
- Acid etch or diamond grind the concrete to open the pores and create a profile the epoxy can grip.
- Vacuum thoroughly to remove all dust and grit from the etching process.
- Fill cracks and chips with a concrete patching compound and let it cure fully.
- Check moisture again and confirm the floor reads below 4 lbs per 1,000 sq ft on a moisture vapor test.
A surface that feels slightly rough like 80-grit sandpaper is ideal. If the floor is too smooth, the epoxy will not stick and will peel within months.
Top Black Epoxy Products Worth Buying
Not all epoxy products perform equally. For a garage floor that sees heavy use, choosing the right formula makes a significant difference in both ease of application and long-term results.
Here are the best options available in 2026:
- Rust-Oleum EpoxyShield Professional Floor Coating is a two-part water-based formula that is easy to mix and apply. It delivers a hard, chemical-resistant finish ideal for most residential garages.
- ArmorPoxy Full Broadcast System is a 100% solids product that provides maximum thickness and durability. It is best for heavy use situations.
- Radonseal Plus Epoxy Garage Floor Paint offers strong adhesion with good abrasion resistance. It works well in areas with moderate moisture.
- Sherwin-Williams H&C Epoxy is a professional-grade product often used by contractors. It provides excellent gloss retention and coverage.
- Valspar Armor Epoxy Garage Floor Coating is a budget-friendly two-part kit that works for light to moderate traffic garages.
Always choose a product rated for your square footage, and buy 10 to 15% more than you think you need to allow for edge coverage and a second coat.
Step-by-Step Black Epoxy Application Process
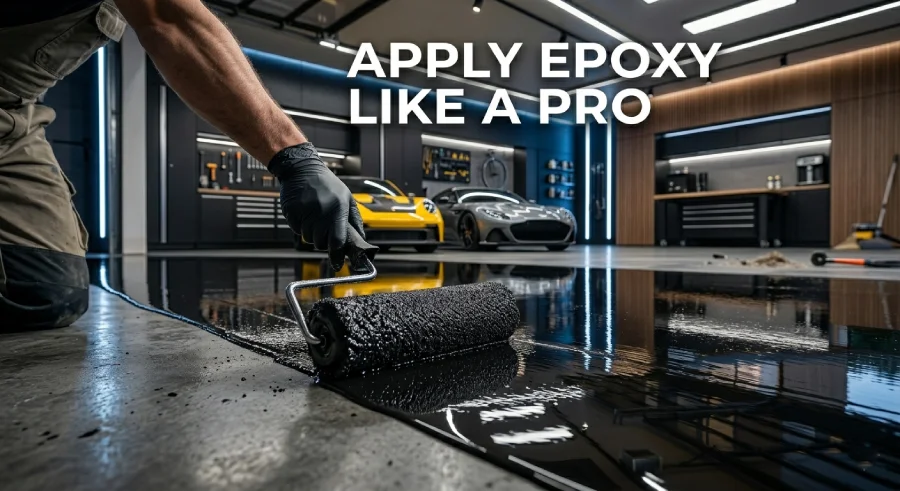
Once the floor is properly prepared, the application process is straightforward. Work in sections and maintain a wet edge throughout to avoid lap marks.
- Mix Part A and Part B according to the manufacturer’s ratio, usually one to one by volume. Stir for the full recommended time, typically 3 to 5 minutes.
- Let the mixture breathe or induct for 30 minutes before applying. This activates the chemical reaction and improves flow.
- Cut in the edges with a brush along walls, columns, and corners.
- Roll the epoxy onto the floor using a 3/8 inch nap roller. Work in 4-foot wide strips moving backward toward the exit.
- Add decorative chips or flakes while the coating is still wet if desired. For a pure black look, skip this step.
- Apply a second coat after the first has cured to a tacky stage, usually 12 to 24 hours.
- Seal with a clear topcoat for extra protection against UV yellowing and abrasion.
- Wait the full cure time before walking on the surface. Do not park vehicles for at least 7 full days.
Temperature and humidity matter. Apply epoxy when the floor temperature is between 55°F and 90°F and relative humidity is below 85%.
Common Black Epoxy Floor Mistakes to Avoid
Even experienced DIYers run into problems when applying epoxy. Most failures come back to a few repeat mistakes that are easy to prevent.
- Skipping moisture testing is the number one cause of peeling. Always test before you start.
- Not etching properly leaves the concrete too smooth for the epoxy to bond.
- Applying in cold weather slows the cure and weakens the final coating.
- Mixing too quickly traps air bubbles that appear on the finished surface.
- Applying too thin creates a brittle coat that chips under vehicle traffic.
- Not reading the induction time causes the product to cure before it levels properly.
- Using a bargain-bin sealer on top can cause adhesion failure between the epoxy and topcoat.
Taking an extra hour during prep and reading the product data sheet from start to finish will prevent most of these issues.
Black Epoxy vs. Other Garage Floor Options
Before committing to epoxy, it helps to understand how it compares to competing products on the market today.
| Option | Cost Per Sq Ft | Durability | DIY Friendly | Appearance |
|---|---|---|---|---|
| Black Epoxy Coating | $3 to $7 | Excellent | Yes | Glossy, professional |
| Polyurea Coating | $8 to $15 | Superior | Moderate | High gloss |
| Polyaspartic Coating | $6 to $12 | Very Good | Moderate | High gloss |
| Concrete Stain | $2 to $5 | Moderate | Yes | Matte or satin |
| Rubber Floor Tiles | $3 to $8 | Good | Yes | Functional |
| Plain Concrete Sealer | $1 to $3 | Low | Yes | Flat, basic |
Polyurea and polyaspartic coatings outperform epoxy in some technical areas, especially UV stability. However, they cost significantly more and require faster application times that challenge most DIYers. For most homeowners, a quality two-coat black epoxy system hits the best balance of performance, price, and ease.
How to Maintain a Black Epoxy Garage Floor
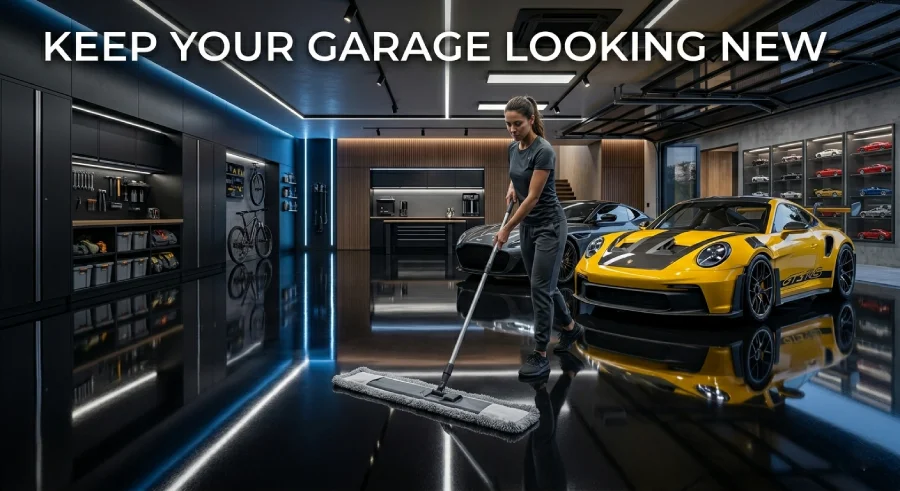
Once your floor is fully cured, keeping it in excellent condition requires very little effort. The coating is naturally resistant to most things that would damage bare concrete.
Follow these simple maintenance practices:
- Sweep weekly with a soft dust mop to prevent grit buildup that can scratch the surface over time.
- Mop monthly using warm water and a few drops of dish soap or a pH-neutral cleaner.
- Clean oil spills immediately by blotting with paper towels before scrubbing with a degreaser.
- Avoid harsh chemicals like bleach or ammonia, which can dull the finish.
- Place felt pads under tool stands, shelving units, and other heavy items to prevent point pressure marks.
- Recoat every 5 to 10 years depending on traffic levels to keep the floor looking fresh.
A black epoxy floor that is properly maintained will look just as sharp a decade from now as it does on the day of installation.
FAQs About Black Epoxy Garage Floor
Can I apply black epoxy over existing garage paint?
You can apply epoxy over old paint only if the existing layer is fully bonded and not peeling. Test adhesion by taping a piece of duct tape to the floor and pulling it off. If paint comes up, remove the old coating before applying epoxy.
How long does a black epoxy garage floor last?
A professionally applied black epoxy floor lasts 10 to 20 years with proper maintenance. DIY applications typically last 5 to 10 years, depending on surface prep quality and product choice.
Does a black epoxy floor show footprints and dust?
Black high-gloss floors do show dust and light footprints more visibly than matte finishes. Regular sweeping every few days keeps the surface looking clean. A satin finish is an alternative for lower maintenance.
What primer should I use under black epoxy?
Use a penetrating concrete primer or a dedicated epoxy primer from the same brand as your topcoat. This improves adhesion and seals the concrete against moisture vapor transmission.
Is black epoxy slippery when wet?
Standard gloss epoxy can be slippery when wet. Add anti-slip aggregate like aluminum oxide or fine sand to the topcoat layer to create a safer surface without affecting the appearance significantly.
How many coats of epoxy does a garage floor need?
Most garage floors need a primer coat plus two topcoats for full coverage and maximum durability. Thin single-coat applications save time upfront but require recoating much sooner.
Can extreme cold damage a black epoxy floor?
Cured epoxy handles cold temperatures well. Damage occurs during the application phase, not after curing. Do not apply epoxy when floor temps are below 55°F, as the coating will not cure properly.
Is a Black Epoxy Garage Floor Worth It in 2026?
The answer is yes for nearly every homeowner who wants a functional and attractive garage. The upfront cost is manageable, the results are dramatic, and the floor holds up to real-world use year after year.
A black epoxy garage floor adds value to the home, improves the usability of the space, and makes routine cleaning far easier than bare concrete. Pair it with good lighting and organized wall storage, and the garage becomes one of the most impressive rooms in the house.
Start with solid prep work, choose a reputable product, and follow the cure schedule without shortcuts. That approach turns a basic slab into a surface you will still be proud of a decade from now.

